Mini painting
Trying a lightning effect
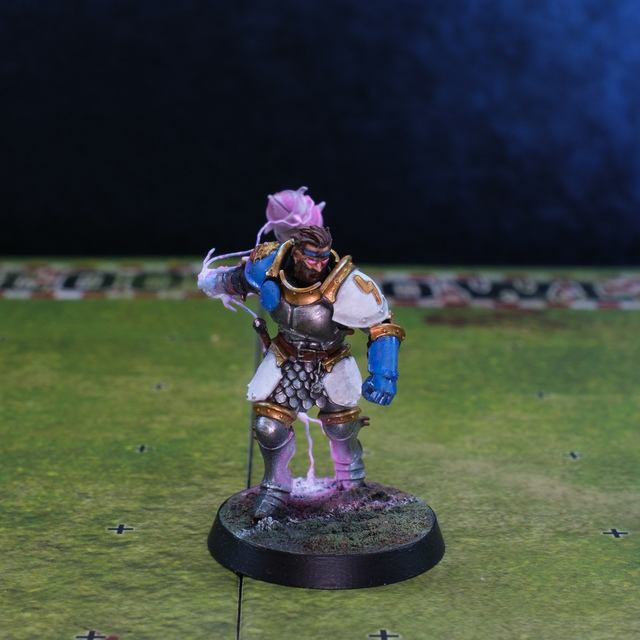
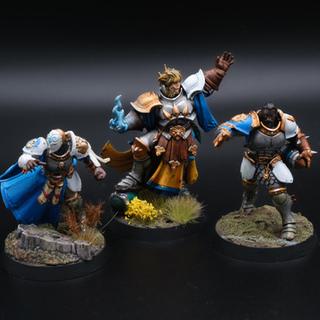
While kitbashing my Stormcast Eternals Blood Bowl team, I had the idea to give one player a Wonder Woman-esque ‘lightning lasso’ for launching the ball forward.
I was converting one of the new-style Liberator models for use in Blood Bowl — often a simple process of just removing weapons — when the pose of this particular liberator gave me an idea.
The original model is swinging back his right arm with hammer and I thought some kind of lightning-based lasso/sling for throwing the ball could be a fun gimmick.
First attempt: paperclip
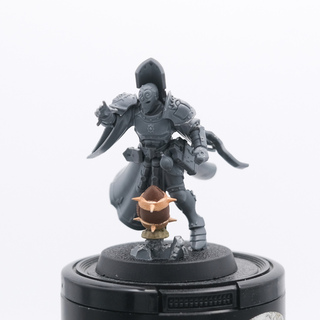
After cutting away the hammers, I carefully drilled through the fist where the hammer haft would be and then threaded through a paperclip, bending it roughly to create an impression of a rope being swung with momentum.
On the longer end, I wrapped the paperclip around a spare Blood Bowl ball: the idea being the lighting caught around the ball in order to launch it down field.
I was pretty happy with the general shape of this attempt and began painting the model this way, but when it came to creating the effect of lightning I just couldn’t get it right.
Second attempt: thinner wire
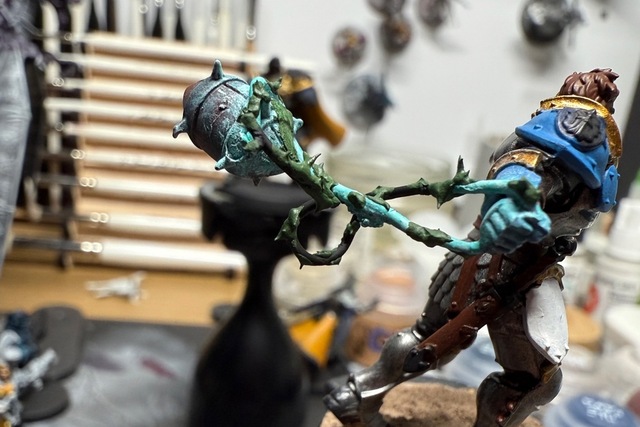
After a couple of tries painting the paperclip to look like lightning (even dabbing on some wisps of liquid green stuff to try to create ‘crackles’), I walked down to Hobbycraft one lunchtime in search of thinner jeweller’s wire.
Luckily I found a few versions on sale, including some bullion wire: wire that already has a bit of zig-zag pattern to it. Great for lightning, surely!

With the thinner wire, I could actually fit a couple of strands through the hand and so I did one main one similar to the original, wrapping around the ball and then a shorter second piece just to represent a couple of sparks coming out from the hand.
The bullion wire was a good shortcut for that zig-zag lightning shape and the thinner gauge of the wire helped too.
Making it read as lightning
Painting it to actually read as lightning is the really hard part. I watched a few videos and had tried with just paintbrushes to a little success, but the area-effect lighting still wasn’t there.
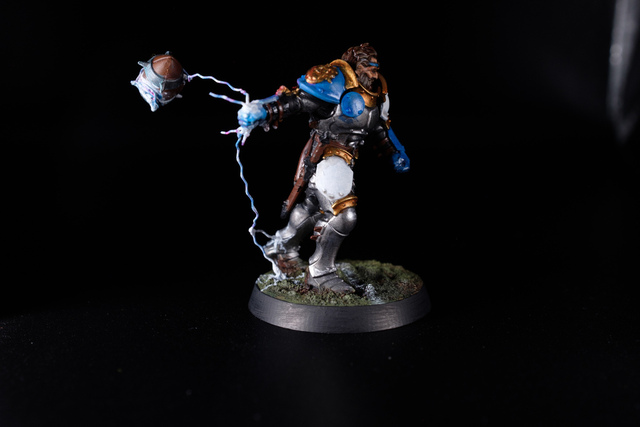
Because I’d already painted the bulk of the miniature I was reluctant to try my airbrush as I hadn’t practiced any close control with it yet, but in the end this week I bit the bullet and, yep: an airbrush makes this whole OSL thing a lot easier.
Just being able to get that fade-out area effect so easily, as well as true directional paint application (you can point the airbrush from the direction of your light source and hit the right areas) makes such a difference compared to using a brush where you need a lot more brush control, practice and understanding of where to paint the light.
So at last, I’ve got to a point where I’m reasonably happy with this miniature for my current level of skill. Encouraged, I’ve also quickly made progress on a converted Knight Incantor for the team and have been trying a bit of a magic effect which I’ll share separately.
Back to my lightning-lasso lad, I’ve overdone the ‘glow’ on the ball now, so I need to go back to that at some point. I’ve really struggled getting that bit balanced nicely: it was previously too little and now it’s way too much. I’ll give it some time and hopefully get it right on the third attempt in the future.